
Building A Partnership With Your Horse
 It is now time to apply all the great trail training we have covered in the previous articles and do a fun activity with your horse – a picnic trail ride. If it is not picnic weather in your part of the country right now, you can use the information in this article later, when it is. Be sure to follow all the steps for training your horse on the trail before heading out. Once you have completed a warm-up for both the horse and the rider, it is time to pack for the picnic.
A number of good companies make saddlebags that allow picnic items to be safely and conveniently carried on horseback. There are bags that fit or attach on either the front or back of the saddle. A western saddle, or a saddle specifically made for trail riding, will have more attachment points for carrying bags.
Fill out the packing list of what to bring on the picnic at least one day in advance of the departure date. Try to pack as lightly as possible. When packing, always put heavier items or long items over the pommel or at the horse’s wither area in front of the saddle rather than in back of the saddle. Of course, pack heavier items on the bottom of the saddlebag to keep it weighted down and so as not to crush lighter items. Try to balance the weight within each individual saddlebag, and distribute the weight between saddlebags as evenly as possible.
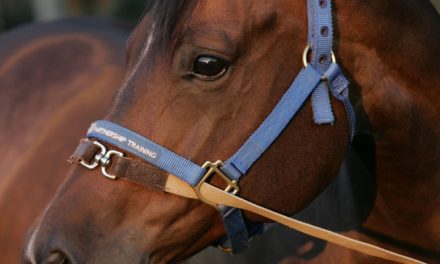
Besides the picnic goodies, remember to bring some important items for your horse. Put a halter on him, either under or over the bridle. Make sure it has a good lead and snap attached. Tie the end of the lead around his neck using a knot that will not hang down so low that it gets caught between his legs. Equip him with protective boots, especially if he is wearing shoes.
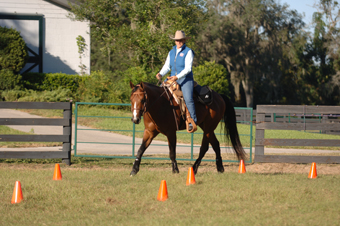
Before you begin your ride, plan how the ride will be conducted. Whether you are riding by yourself or with a group of friends, decide what gaits to work in during the ride. Consider the experience levels of the horse(s) and rider(s), the trail’s terrain, and the distance to be covered. You can ride the trail at the walk only, at the walk and trot, or at all three gaits, varying the speed within each gait to add interest.
Once the horse is packed, conduct a short under-saddle warm up to make sure everything is secure and that it will stay in place during the ride. This also will give the horse a chance to get used to the load before hitting the trails.
When you reach the picnic destination, tie your horse to a tree. Because the halter and lead are already on the horse, you will not have to change tack to tie him. If you are with a group, select a spot to tie him where there is enough room between him and the next horse so that they cannot touch. Always tie the lead rope high. The knot should be at ear level of the horse. Always use a slipknot to tie the horse, putting the end of the lead through the slipknot so the horse cannot pull on the end and untie himself. The length of the lead between the tree and the horse is also very important. It should be taut at the horse’s natural head level. If he is tied lower than that, he could get a leg over the lead. Secure the reins so that the horse cannot get them over his head or step through them.
If your horse is a beginner at being tied on the trail, he will probably move around the tree and/or paw the ground. These behaviors show his lack of experience and patience. Conduct the picnic in a spot where you can keep an eye on him. Just watch him, but do not interfere unless he gets into trouble. Leave him alone, and he should settle down in a short amount of time. The more you acknowledge his impatience, the more he will act up.
If a horse that is tied gets too fretful or uncontrollable during a trail picnic, you need to address the issue and turn the situation into a learning experience for him. Untie the horse from the tree and lead him to a spot closer to the picnic area where he can graze. Hand graze him for 10 to 15 minutes, and then tie him again at the tree. Allow him to remain tied for 10 to 15 minutes, and then untie him and let him graze again for the same amount of time. Alternate short segments of being tied with short segments of grazing. This should calm the horse down and teach him to accept being tied. The more often you take the horse on the trail and expose him to being tied, the more he will accept it.
When the picnic is over, it is time to pack up for the trip home. The good news for the horse is that his packs should be lighter. Because of the weight difference, be sure to secure all packs and bags to the saddle and properly balance them.
Do not forget to cool out your horse when you get back from the picnic. Sponge his legs, back, girth area, between his legs, and where the headstall of the bridle lies with cold water before putting him back in his stall or into the trailer. Cooling off these areas will help prevent the horse from becoming stiff and sore. Be sure to give your horse a treat and a pet to say “thank-you” for a great picnic trail ride together!
My E-Book, Training Outside the Box, is available at www.lynnpalm.com along with other valuable training products, or call 800-503-2824.
