
Palm Partnership Training™
Building a Partnership with your Horse
If you have been following this series, we’ve been discussing how to teach your horse basic ground training commands including “come to me”, “move away from me”, and “whoa” or stop. Now I am going to share tips for teaching your horse the fourth basic command- how to “back”. Make sure your horse is consistently responding to the first three commands before introducing this lesson.
Backing is an excellent exercise to improve communication with your horse and sharpen your reactions to control his body position. It also improves under saddle work because your horse learns to respond to your vocal and body language cues, with lightness.
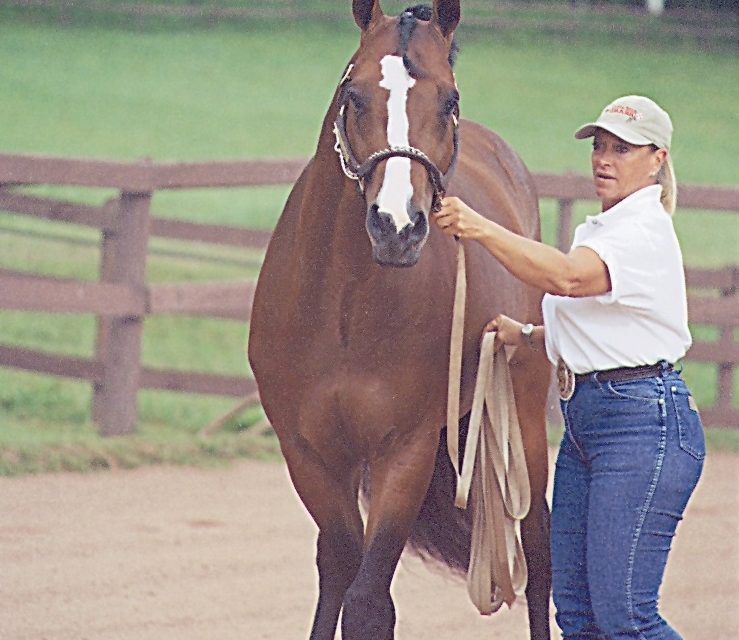
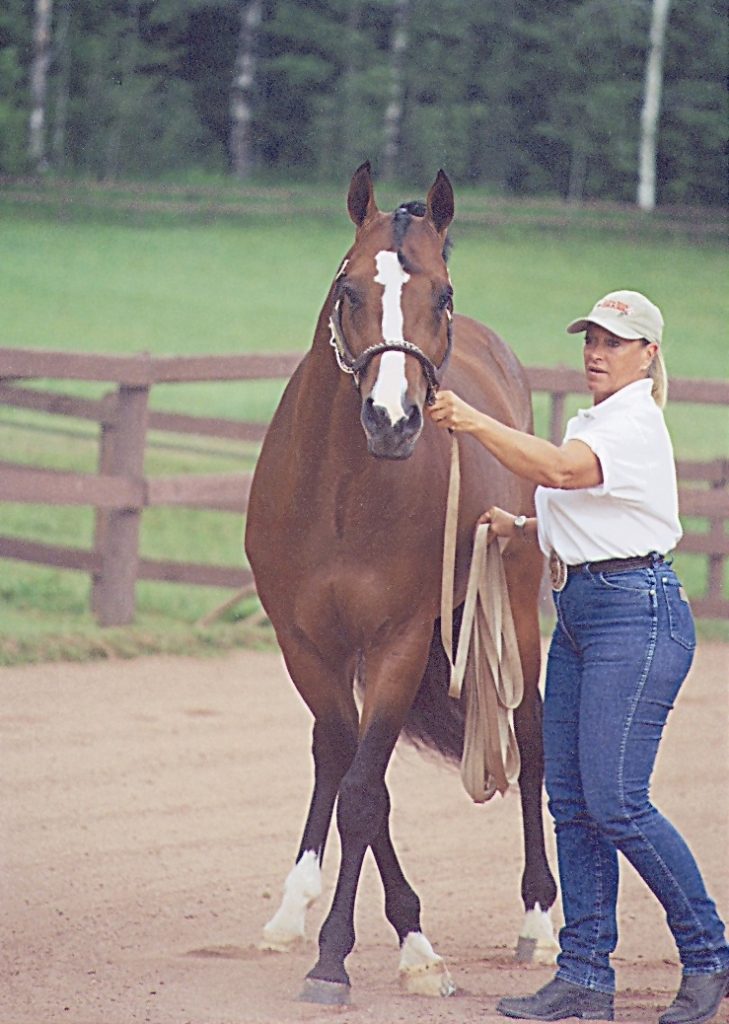
Before we start, let’s quickly review how to set a foundation for success. Make sure your horse is properly equipped for training. You don’t need any fancy equipment or training aids. A properly fitting halter, a longe line or lead rope, and leg protection is all he needs. I recommend using a longe line because its length gives more flexibility to move with your horse and still remain in contact.
Instead of attaching the longe to the bottom halter ring, I prefer the “longe-line-over-the-nose“ technique for more control. Thread the longe line through the halter ring on the side you are working on, over the nose, clipping it on the ring on the opposite side of the halter. Make sure that the snap faces outward. It will be easier to release in case of an emergency. I like using my Palm Partnership Halter because, unlike other halters, the rings are designed large enough to allow a lead or longe to easily fit through them. Excess longe line should be held in a loose, but organized neat coil.
I’ll stress again the importance of location when teaching any ground training command. Introduce this maneuver in a confined area, free from distraction, and familiar to your horse. His stall is a perfect place. When he demonstrates consistent responses to your commands there move to a slightly less secure, larger area such as an aisleway of the barn, then a round pen or paddock and repeat the maneuver. Continue this process, each time graduating to a slightly less secure location until you can get consistent responses anywhere you ask your horse. If your horse does not understand or is inconsistent in his responses, go back to a more secure location and repeat the lesson there.
Your goal is to teach your horse to willingly back up on a loose lead, while keeping his body straight from his poll to the top of his tail, without any pressure or tugging. Sound impossible? Let’s break it down into some simple steps.
A horse can best perform this maneuver when he is straight which will enable him to be balanced. So give yourself and your horse an advantage by positioning him alongside a wall or fence to help keep him straight when starting this maneuver.
Stand at your horse’s near (left) side approximately one foot away from him. Turn and face your horse so that you are slightly in front and off the side of his left shoulder. Never stand directly in front of any horse. It is an unsafe position and a common error when teaching this maneuver.
Direct your vision to focus on the horse’s entire topline, from his head to the top of his tail. This will allow you to see a bigger picture of what happening and better evaluate and respond to your horse’s reactions. Avoid the common error of looking down at the horse’s feet. Focusing attention there prevents you from seeing his responses and body position.
With the coiled longe in your right hand, lightly place your hand the left side of your horse’s halter at the chin piece (the part of the halter that goes underneath the head). As I’ve stressed in past lessons—if you control the horse’s head, you control his body position. Your contact will only be used to guide the head and neck to keep them straight in the middle of the shoulders and in alignment with the spine.
Using a deep, commanding tone say “back” as you apply light pressure on the halter and move toward your horse’s shoulder. Use your contact on the halter to keep his head straight. Do not pull on the halter or the lead to force him to move! The instant your horse takes a step backward, step with him. Release the pressure as you ask him to stop using the “whoa” command. Praise him with a stroke on his forehead or a pet.
If your horse does not respond, re-evaluate your position, reposition him by walking him forward (you don’t need to turn around, just back up a few steps as you continue to face him) and ask him to back again. This time add a little reinforcement by pressing your right hand on the point of his shoulder (the “point” refers to the round joint, much like our shoulder joint, located at the bottom of his shoulder) to encourage him to step backward.
Keep a contact on the point of his shoulder using either a steady pressure or soft pulsating contact that varies in pressure with the timing of the horse lifting his legs to step backwards. Avoid using an on-off type touch, a tap, or slap, which will only frustrate or aggravate your horse. The instant that he makes an effort to move backward, praise him. As he learns the verbal cues, you will eliminate this guiding pressure and the touch on the halter. He will respond and “back” with a voice command only.
Once he can consistently back several steps alongside the wall, ask him to back from the middle of the stall. This will be more challenging because you will not have the wall to help keep him straight.
The tendency for most horses is to swing their hindquarters out of the desirable straight-line alignment when backing. It is usually moving the hips to the right if the handler is working from the near side since because most people will unintentionally move the head to the left and towards themselves when executing the maneuver.
To correct hindquarter alignment problems, you must react quickly to slightly reposition the horse’s head in the same direction that his hindquarters are moving to re-align his body. For example, as your horse is backing his hindquarters swing out to the left. With light tension on the lead, reposition his head slightly to the left as he continues to step backwards. This will cause him to move his hindquarters to the right, straightening his body.
If your horse gets too far out of alignment, ask him to walk forward a few steps to straighten his body. Stop, reposition, and ask for the maneuver again. Focus on keeping his head straight as you ask him to back. Watch his topline to anticipate and respond to alignment problems as they happen.
Vary your command to back with the “come to me” command so that your horse doesn’t associate your presence at his shoulder with a reaction to back up. Once he consistently responds to your command to back on his near side, repeat the lesson on his off (right) side.
Your Next Step…
Make it part of your schooling to practice the “back-up” command and the other in-hand lessons we’ve covered in the past several articles. Create exercises using combinations of these four basic ground-training maneuvers to keep your horse interested and to build his responsiveness to your commands. Time spent on ground training will pay big rewards in precision responses in your horse without pressure, tugging, or pulling!
- Palm Equestrian Academy generalinfo@lynnpalm.com 352/362-7847
- Cyril and Lynn offer clinics throughout the country and abroad as well as online coaching. Join them on their teaching tours or their Palm Equestrian Academy European Journeys.