
Palm Partnership Training
GET RESULTS YOU CAN USE
 In our last PPT Training Tips, “How to Put Your Horse in Balance Through Proper Bending – Part 2”, I reviewed what a correct bend of your horse’s body looks like, and the aids sequence used to ask your horse to bend correctly. I then introduced an exercise to help train your horse to bend correctly. I hope that you have enjoyed practicing this exercise at home and are gaining confidence with riding on curves and keeping your horse balanced! This is such an important step in improving your riding skills.
In this week’s “How to Put Your Horse in Balance Through Proper Bending – Part 3”, I will review Exercise #1, and will discuss common problems that often arise from bending exercises such as this and how to correct them. I will also present a new exercise which builds on Exercise #1 and is more advanced for improving bending on either side. Your horse will love this exercise too as it follows the same consistent guidelines to stay balanced! This will help advance your horse’s suppleness, strength, responsiveness to your aids and balance!
Review of Bending in Exercise #1
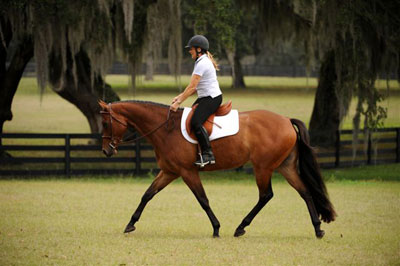
In this introductory exercise we set up a large circle that used cones as a guideline to ride the curve consistently with a proper bend.
Common Problems Solutions
Hips swinging out Outside supporting leg, slightly behind girth to support bend
Shoulder going out Outside neck rein for horse to yield and keep the shoulders on track
Head flexing too far inward Outside open rein to straighten head
Horse moves or turns inward Inside leg aid behind the girth to move the horse outward and inside indirect (neck) rein to yield the forehand outward
Most often problems with a horse’s performance, like the ones above, are due to rider error. In order for your horse to bend properly and be balanced on a curve both reins and both legs must be active for every stride. When you are able to control the bend at all times, including throughout upward and downward transitions, can stay in the middle of the track, and can stay balanced while changing direction, you are ready to progress to Exercise #2!
Exercise #2
Part 1 – Begin with the same size circle that we used in Exercise #1 (eight sets of cones on a circle with a diameter of 70’ with one cone in the middle). Again, as a review on how to correctly measure your circle, start at the middle cone and walk large steps. Go 12 large steps and place a cone (approximately 36’) then walk two large steps and place a second cone (approximately 6’). This is your first quarter of the circle. Continue with the other three quarters of the circle. Finally, make sure your quarters line up with the other half of the circle.
The difference with this exercise is that we will now add another degree of difficulty with poles on the ground. Start with one pole on your circle in the middle of one pair of your cones. Let’s begin by tracking to the right at a walk. Make sure you ride in the center of your pole.
Continue this same exercise at the trot once you are comfortable at the walk. Your goal is to be able to feel any slight change of speed in your horse and to control that speed. If your speed increases, more than likely your horse is too far inward on the pole or cones. On the other hand, if your speed decreases, more than likely your horse is too far outward. Maintain the correct body position over the pole as you would if the pole were not there.
When you have mastered this exercise at the walk and trot, add another pole on the half circle, followed by a third pole on your quarter circle, then finally, the most advanced is four poles on the quarter circle. Do not attempt this exercise at the canter until you have absolute control of your horse’s bend and balance at the walk and trot. Once you are confident at the trot, pick up your canter from the trot. Of course, the same bending aids sequence at the trot applies to the canter. Control the bend through your upward transition! Your horse should maneuver smoothly through the circle, without hitting the poles or changing speed. If this happens, your horse is balanced and in total control!
If your horse hits a pole, then your speed was not consistent. You have to concentrate and not let your eyes go downward at all to be able to feel a very slight difference in a change of speed. If your horse is going to change speed, it will usually take place a few strides before the pole. Your horse can change speed over or after the pole too. If you continuously control your horse’s bend and balance, you will have a much easier time controlling speed. When a horse is balanced, he maintains the same speed on his own! However, if the pole was hit with the front of the hoof of either the front or hind leg, the speed is usually too fast. If the pole is hit with the back of your horse’s heel or if your horse steps on the pole, the speed is usually too slow. Trust me, if you ride the center line consistently, then you will control speed too!
Part 2 – To challenge both you and your horse, try this work on your transitions. You can put your cones closer together, or put three sets of cones in a row. Place the cones in a pair three feet apart, and each pair of cones three feet apart from one another, on a quarter of your circle. Do upward and downward transitions between these cones, to help keep your horse bending and balanced correctly.
Practice this exercise in both directions, but remember not to work more than three circles in each direction. Acknowledge which side is more difficult for your horse and work more in that direction to strengthen muscle for a more even balance. Again, to change directions, change through the middle of any quarter of the circle and change to the opposite side of the circle. If you make sure you have time to get your horse straight and stay close to the center cone of the circle your change of direction will be balanced!
Key Points
As always, keep your horse from being bored! Change your poles on the circle for each lesson. If you have difficulty with two poles, go back to one on a circle. If you have difficulty with four poles, go back to three. Don’t drill your horse! Practice another skill or figure in between and then return to this exercise. To end the day, think of how it went and where you need to improve the bend or speed for your next lesson!
Condition your horse so that he is able to bend properly and be balanced in BOTH directions.
When your horse is balanced, this exercise will be easy, comfortable and fun for both of you! Your horse will be happy and willing to perform!
